
For years, “foundation planting” meant the same recipe: a line of evergreen shrubs under the front windows, maybe a couple of yews at the corners, and a few annuals tucked in like an afterthought. It looks fine, but it rarely feels alive.
A perennial foundation bed can do the same job shrubs do (soften the house, anchor the architecture, guide the eye to the entry) while also giving you months of color, texture, and pollinator life. The secret is structure. When perennials are planned like a layered planting instead of a mixed bouquet, they read as deliberate from the curb and stay attractive even between bloom waves.
What makes a perennial bed look crisp
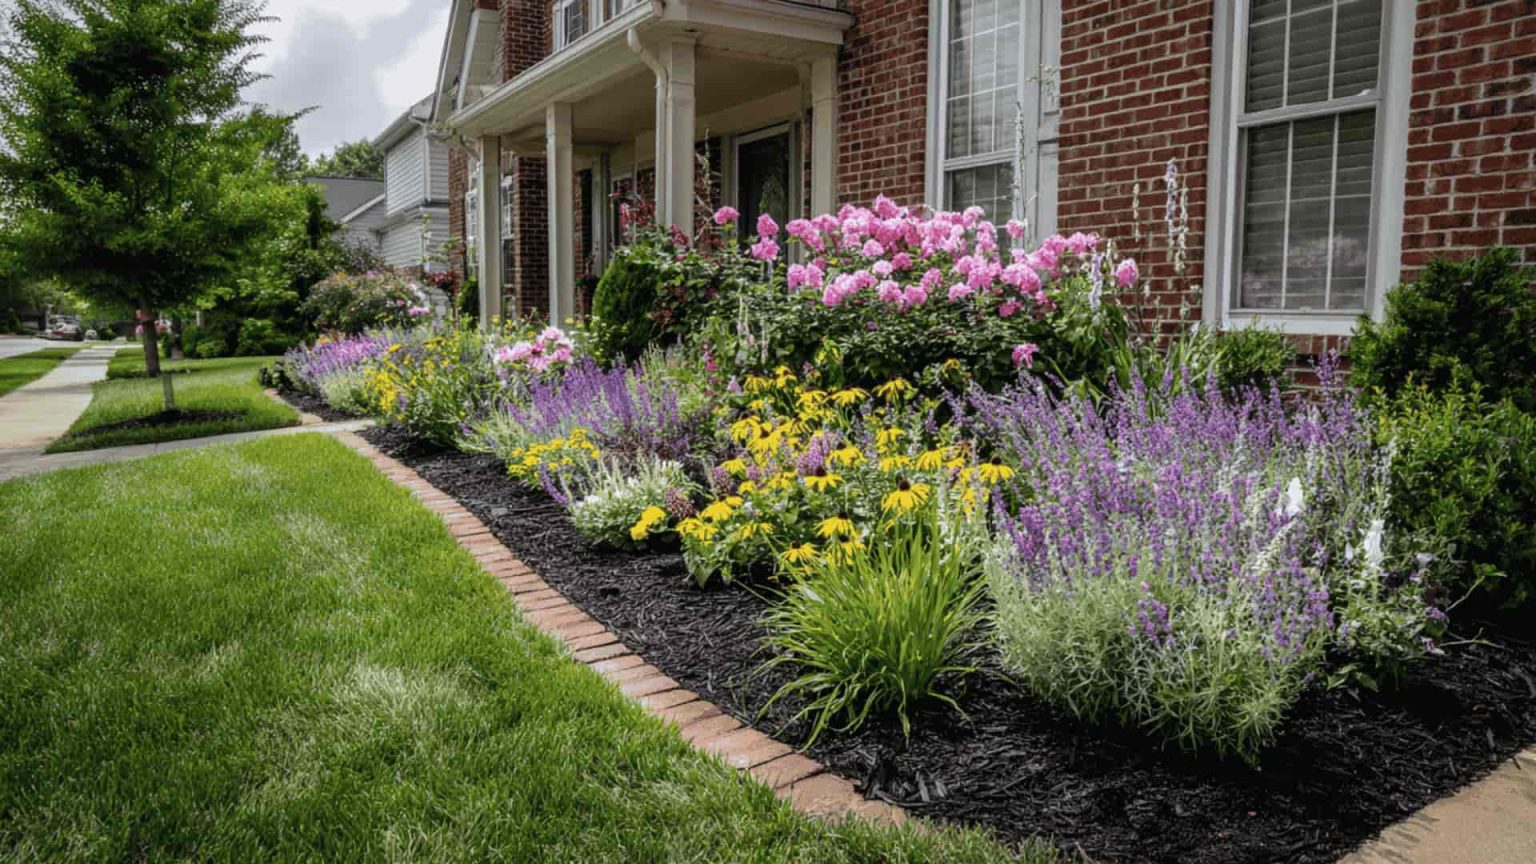
When people worry that perennials will look “messy,” they are usually picturing plants placed without a plan. You can absolutely design perennials to look neat, even formal, with a few best practices that I learned the hard way moving between growing zones.
- Strong edges: A defined bed line is half the battle. A clean spade edge, brick, steel edging, or a narrow strip of gravel reads tidy from the street.
- Repeating shapes: Use the same plant in multiple spots. Repetition is what turns “a bunch of plants” into “a design.”
- Layers: Low plants at the front, medium in the middle, taller toward the house or at key anchor points.
- Winter structure: Perennials shine in bloom season, but you still want something holding the bed together in February. That can be semi-evergreen perennials (like hellebores in many climates), ornamental grasses left standing, or a few small shrubs used as anchors.
- Room to grow: Tight spacing looks great the first year and then becomes a wrestling match by year three. Design for mature width.
Before you plant
Start with sun and sightlines
Foundation beds sit in tricky microclimates. South and west exposures bake. North sides can stay cool and damp. And eaves can create a rain shadow that’s drier than you expect.
- Watch the bed for a day: Note where you get 6+ hours (full sun), 3 to 6 hours (part sun), or less than 3 hours (shade).
- Check window heights: You want plants that will not block glass or trap moisture against siding.
- Keep vents and utilities clear: Leave generous space around dryer vents, hose bibs, gas meters, and HVAC equipment. A good starting point is often 18 to 36+ inches, but the real rule is: check manufacturer specs and local codes, and preserve clear service access. Dryer vents deserve extra caution, since blocked airflow and lint buildup can create a fire risk.
Measure, then design in simple blocks
Instead of choosing plants one by one, break the bed into a few repeating “blocks” that you can repeat along the foundation. Think in clumps of 3, 5, or 7 of the same perennial for a calm, cohesive look.
Soil and drainage first
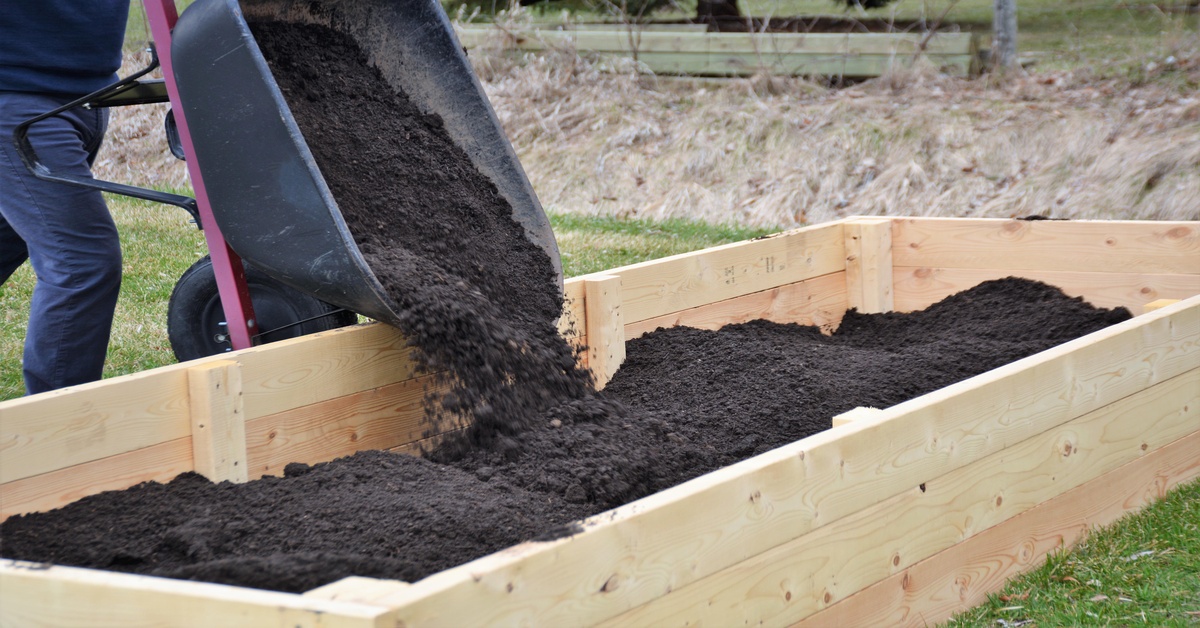
Most foundation beds are compacted from construction and foot traffic. If you do one unglamorous thing, do this: loosen the top 8 to 12 inches and mix in compost across the entire bed, not just in individual planting holes. In heavy clay, avoid amending a small pocket and calling it done. That can create a perched-water “bathtub” where roots sit wet. If you’re unsure, dig a test hole, fill it with water, and see how quickly it drains. Perennials will tolerate a lot, but few tolerate sitting in winter sogginess.
Layouts that fit most houses
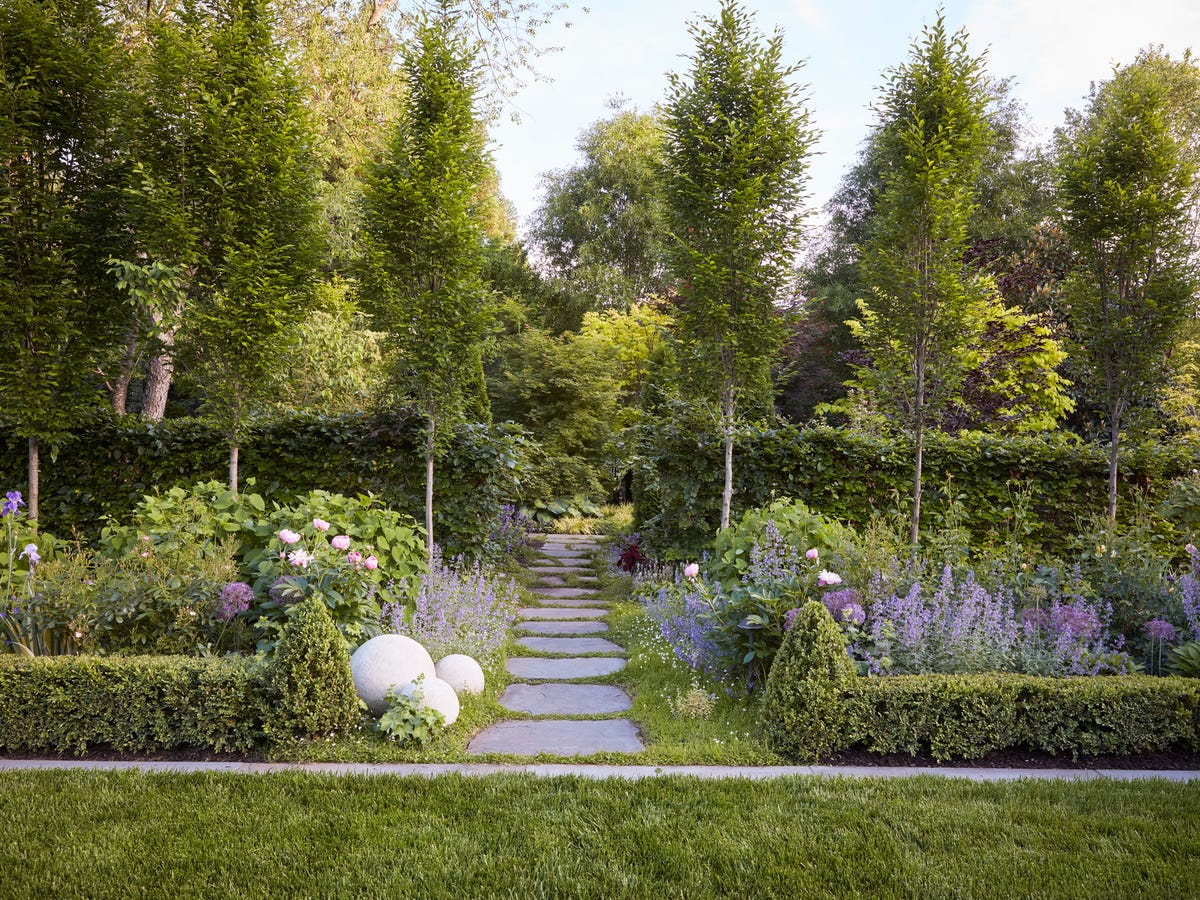
Below are reliable layouts I return to again and again. You can adapt them to cottage, colonial, ranch, or modern homes by changing the plant palette and edge material.
1) Layered ribbon
This is the classic foundation approach, but built with perennials. It reads clean from the curb and is easy to maintain.
- Front edge: 8 to 18 inches tall, continuous or repeating (creeping thyme in sun and sharp drainage, hardy geranium in part sun, or coral bells in part shade).
- Middle layer: 18 to 30 inches tall, repeating drifts. In sun: salvia, catmint, coneflower, daylily. In part shade: astilbe, heuchera, Japanese forest grass.
- Back layer near the house: 30 to 48 inches tall, used sparingly so you do not cover windows (peonies, iris, taller hostas, panicum grass, compact hydrangea if you want a small shrub anchor).
2) Entry welcome pocket
If your front door feels lost, create two symmetrical planting pockets near the entry steps or walkway curve. Symmetry is calming, and it instantly looks high-end even with humble plants.
- Repeat the same anchor plant on each side (a compact grass, dwarf conifer, or a sturdy hellebore where it stays semi-evergreen through winter).
- Fill around it with long-bloom perennials plus one seasonal accent (spring bulbs or a late-summer bloomer) so there is always something happening when guests arrive.
3) Window panels
Instead of a continuous bed, create planting panels under each window with small breaks between them. This works beautifully on homes with several windows across the front and keeps maintenance simpler.
- Keep each panel the same width as the window, or slightly wider for balance.
- Use the same 5 to 7 plants repeated in each panel for a unified look.
- Leave a narrow gap of mulch, gravel, or stepping stones between panels if you need access for painting or maintenance.
4) Corner anchors, softer middle
If you love the clean look of traditional shrubs but want more bloom, anchor the two corners of the house with something evergreen or structurally strong, then fill the middle with perennials.
- Anchors: dwarf boxwood alternatives, compact conifers, or a clump of upright ornamental grass.
- Middle: perennials in repeated drifts that echo the anchors (for example, rounded mounds of catmint to repeat the “round” shape).
Choosing plants
Start with dependable performers
I love unusual plants as much as anyone, but foundation beds benefit from reliable plants that look good for a long stretch. Once the backbone is set, you can tuck in a few fun experiments.
Pick foliage that stays attractive
Flowers are the fireworks. Foliage is the background music that keeps playing. Look for plants that keep tidy leaves, resist mildew, and hold their shape.
- Sun: catmint (Nepeta), salvia, sedum, daylilies, ornamental grasses, yarrow in drier spots.
- Part sun: hardy geranium, heuchera (many do best in part shade), brunnera, astilbe, hydrangeas as accents.
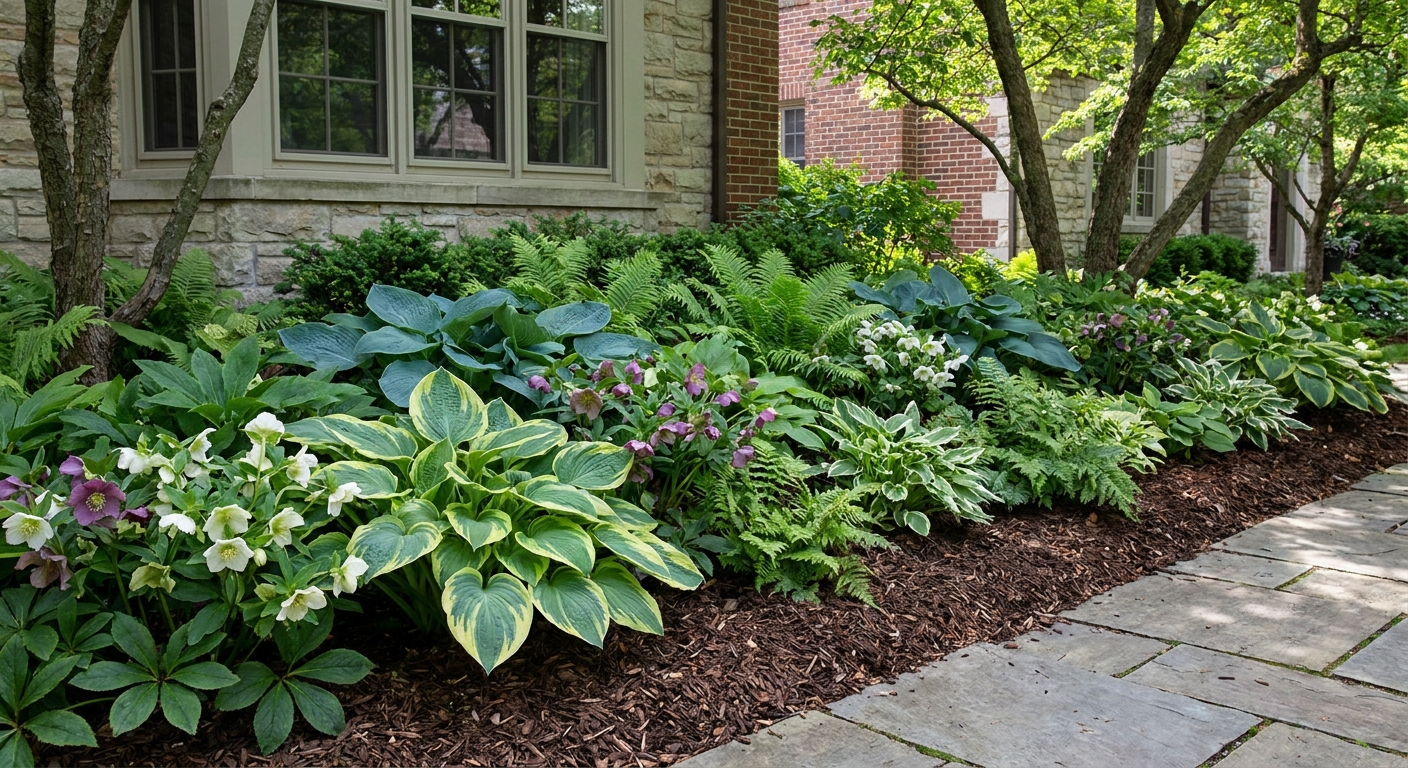
- Shade: hosta, hellebore (often semi-evergreen depending on winter), ferns, Japanese forest grass, some heuchera varieties with morning sun.
Use bloom timing like a relay
A foundation bed feels magical when something is always picking up the baton.
- Early spring: bulbs (daffodils, species tulips), hellebores, creeping phlox in sun.
- Late spring: peonies, irises, alliums, columbine.
- Summer: salvia, coneflower, black-eyed Susan, daylily, catmint.
- Late summer into fall: asters, hardy mums, Japanese anemone (where hardy), ornamental grasses, sedum.
Match scale to your house
A tall, two-story home can handle a few bigger plants or shrubs as anchors. A small ranch looks best with lower, more horizontal layers. When in doubt, keep the tallest plants around 36 to 48 inches and use them in only a few spots.
Keep the color plan simple
From the curb, too many colors can read chaotic. My easiest “never regret it” palettes:
- Calm and classic: white, blue, soft purple, green foliage.
- Warm and welcoming: peach, yellow, rosy pink with deep green.
- Modern and bold: magenta and purple with silver foliage and grasses.
Spacing and layering
A spacing rule that usually works
Look up the plant’s mature width and use that as your starting point. If the tag says 18 inches wide, spacing about 18 inches on center will often fill in nicely by year two in average garden conditions. Fast spreaders and happy grasses can fill sooner, while slow growers (or lean soils) may take longer.
Think in three heights
- Edge layer: 6 to 18 inches tall. This is what people see first.
- Body layer: 18 to 30 inches tall. This does most of the seasonal blooming.
- Accent layer: 30 to 48 inches tall. Use like punctuation, not a solid wall.
Leave room for the house
Keep plants back from siding for airflow, inspection, and easier maintenance. In many cases, 12 to 18 inches is a good minimum, but adjust for your materials, climate, and local pest pressure. Also keep mulch off siding and away from plant crowns to reduce rot and moisture issues.
Replacing old shrubs
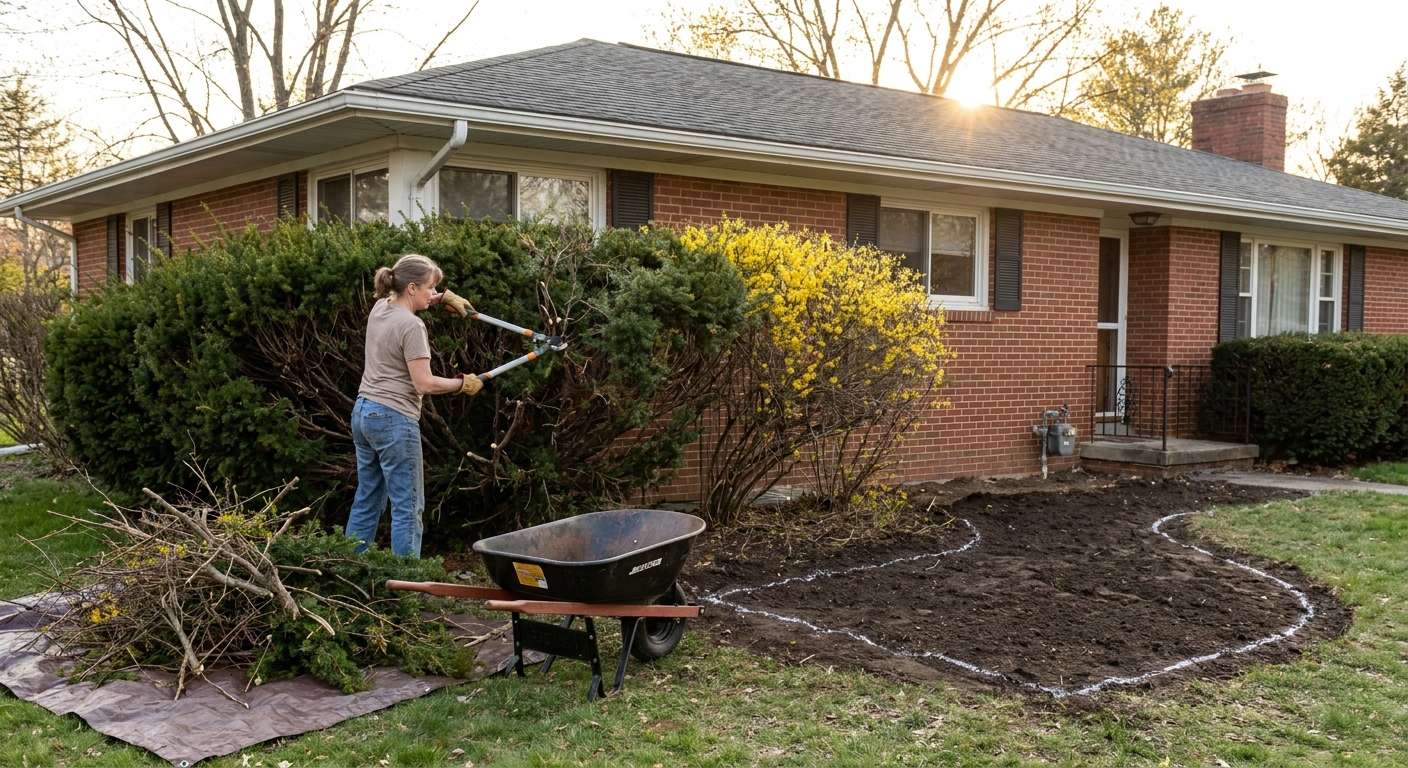
- Remove or reduce shrubs thoughtfully: If you are removing large shrubs, cut them down first, then dig or grind the stump. For some evergreens, it can be easier to remove in stages so you do not end up with a bare front yard all at once.
- Fix the soil: Loosen compacted soil and add compost broadly. If water puddles, address drainage before you plant.
- Lay out plants in pots: Set everything on top of the soil first and step back to look from the street. Swap positions until it feels balanced.
- Plant, water deeply, then mulch: Water in well. Add 2 to 3 inches of mulch, keeping it pulled back from crowns and stems.
- Label for year one: A simple plant map or a few discreet markers saves you from accidentally digging up sleeping perennials next spring.
Details that make it look complete
Add a crisp border
If you want your perennial foundation bed to look deliberate, define it. Even a clean spade-cut edge refreshed once or twice a season makes a huge difference.
Repeat one signature plant
Choose one perennial that repeats every 3 to 6 feet. That repetition is what makes the bed look designed rather than collected. Great signature plants include catmint (sun), coral bells (part shade), or a compact ornamental grass (sun to part sun).
Use negative space
Not every inch needs a plant. A little open mulch or gravel between clumps helps each perennial read as a shape.
Plan for winter, not just bloom
Depending on your climate, that might be semi-evergreen hellebores, leathery heuchera leaves, seed heads left standing (coneflower and grasses), or one or two small shrubs kept as anchors. In harsh winters, even “evergreen” foliage can look tattered, so it helps to lean on strong plant forms and repeatable shapes, not just leaves.
Maintenance for curb appeal
Watering in the first season
Year one is about roots. Water deeply and less often. Most new plantings do better with a good soak once or twice a week than a quick sprinkle every day, adjusting for heat and rainfall.
A simple tidy routine
- Spring: cut back last year’s stems, top-dress with compost, refresh edges.
- Early summer: deadhead or shear plants like catmint or salvia after the first flush for a second bloom.
- Late summer: stake only if needed. If a plant flops every year, replace it with a sturdier variety.
- Fall: leave some seed heads and grasses for winter interest, cut back anything that gets mushy.
Weeds without landscape fabric
I avoid landscape fabric in perennial beds. Perennials expand, self-seed, and need soil that stays healthy. For a new bed, sheet-mulching with plain cardboard topped with mulch can help knock back weeds while the planting fills in. After that, a 2 to 3 inch mulch layer and a quick hand-weed after rain is usually the lowest-drama routine.
Mulch, but do not bury crowns
Mulch should sit like a blanket on soil, not like a pile against plant stems. Keep crowns visible to reduce rot, and keep mulch off siding.
Plant combos that stay neat
These combinations are meant to feel cohesive and architectural, not wild. Swap varieties to match your zone, humidity, and sun level.
Sunny, low-maintenance
- Front edge: creeping thyme or low sedum (best in sun and well-drained soil)
- Middle: catmint + salvia repeated in drifts
- Accents: coneflower in small clusters + an upright ornamental grass
Part sun, welcoming
- Front edge: hardy geranium
- Middle: heuchera for foliage + daylilies for summer color
- Accents: peonies or irises for late spring, then asters for fall
Shade-friendly and tidy
- Front edge: heuchera (often best in part shade) or low hosta varieties
- Middle: astilbe and ferns for texture
- Accents: hellebores for early blooms and off-season presence
Adapt for zone and wildlife
If you take one thing from the plant lists above, let it be this: treat them as a starting point, not a promise. Check your USDA zone, summer humidity, and winter exposure. A plant that is perfect in a mild coastal garden may struggle in a hot inland summer, and a “full sun” plant near a reflective wall can behave like it’s in a frying pan.
Also, be realistic about deer and rabbits. In many neighborhoods, they treat foundation beds like a buffet. If browsing is common where you live, lean harder on tougher choices (ornamental grasses, many salvias, catmint, yarrow, ferns) and consider swapping the most tempting plants for more resistant look-alikes.
Common mistakes
- Planting too close to the house: Leave room for airflow and access, and keep mulch off siding.
- Underestimating utility clearances: Preserve service access and follow manufacturer specs and local codes, especially around HVAC equipment and dryer vents.
- Choosing only peak-bloom plants: Add strong foliage plants and repeat them for structure.
- No repetition: If everything is different, the bed looks busy. Repeat your best performers.
- Ignoring mature size: The first year lies to you. Read mature widths and believe them.
- Skipping the edge: A fuzzy bedline makes even beautiful flowers look unkempt.
FAQ
Can perennials really replace shrubs in a foundation planting?
Yes, with one caveat: include structure. That might be semi-evergreen perennials, ornamental grasses, or a few small shrubs kept as anchors. Purely flower-only beds can look bare in winter in colder climates.
How deep should a foundation bed be?
For layered perennials, 4 to 6 feet deep is comfortable if space allows. You can do it in 3 feet, but you will need to choose narrower plants and keep the design simpler.
What if I want a very tidy, almost formal look?
Use symmetry near the entry, repeat plants in clean blocks, keep your color palette restrained, and choose mounded perennials that hold shape. A crisp edge and consistent mulch go a long way.
Do I need landscape fabric?
I avoid it in perennial beds. Perennials expand, self-seed, and need soil that stays healthy. Cardboard sheet-mulch for bed conversion plus a consistent mulch layer is usually easier long-term.
If you want to ease in
If replacing all your shrubs at once feels like a leap, try a hybrid foundation bed for a year or two. Keep one or two evergreen anchors, then convert the spaces between them into perennial drifts. Once you see how much life and color perennials bring to the front of the house, it becomes surprisingly easy to imagine the whole foundation blooming in layers.
And if your first attempt is not perfect, welcome to the club. The best perennial beds are not built in a weekend. They are built in seasons, with little edits that add up to a front yard you genuinely want to come home to.